Customized Reports
Every business is unique, with its own reporting needs. Whatsdash lets you create Custom Reports tailored to your requirements.
Whether you want to build a new report from scratch or modify an existing one, this feature helps you get actionable insights quickly.
📋 Steps to Create Your Custom Report
- Open the Create Report tool : After logging in to Whatsdash, you’ll see the Create Report Button in the Home tab. Click it and choose Custom Report from the dropdown.

- Name your report : Give your report a clear Name. Add a Description if needed, then click Next.

- Choose a report category : Select your Report Category from the available options and click Create to proceed.

- Set a date range : Use the date selector tab to pick a preset (e.g. Month of July) or enter custom start and end dates.
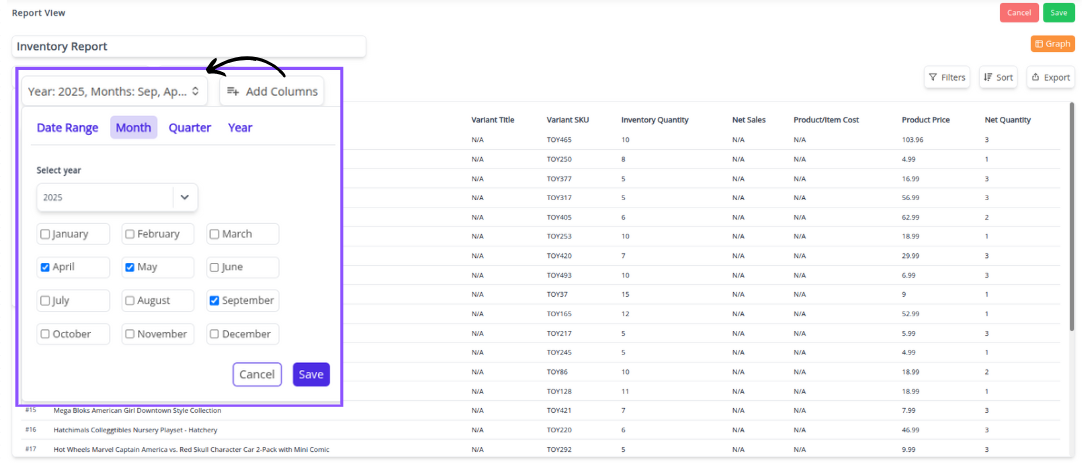
- Select the data fields : Some related fields will be chosen by default. Add more via the Add Columns button. Use the search bar to quickly locate fields.
Example: Barcode (UPC), Inventory Quantity, Price.

- Save your report : Click Save. Access all saved reports anytime by clicking View All in the “Reports” section of the Home tab.

⭐ That’s it! You’ve successfully created a customized report.
📑 Selected Fields Panel
When you click Add Columns, a pop-up window opens.
On the right side, you’ll see a panel listing all the fields you’ve already added to your report.
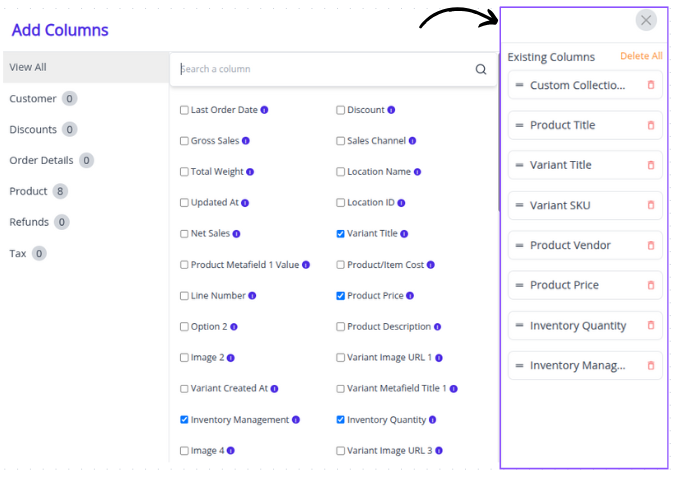
📝 What You See
Left Panel: Shows all available Report Types (categories).
You can switch the report type here and view every field within that type.
Fields with checkmarks are the ones currently included in your report.
Right Panel: Displays the Selected Fields — all the columns you’ve chosen for your report.

🗂 Column Types
- Numeric Columns: All number-based fields (for example: Discount).
- Text Columns: All text-based fields (for example: Product Name).
🔄 Reordering Fields
The selected fields are automatically organized in order.
To change the order, click and hold the two-line handle (≡) on the left side of a field, then drag it up or down to the desired position.